outline
we use github page for serving this blog. we provide this blog by uploading static files(html, css, javascript) created by jekyll to github page. in other words, we can not create and use server-side-source. so we are not also able to create simple email feature on github page and jekyll.
formspree service helps static page like above situation to be able to create sending email feature. this blog post introduces how to apply formspree service to jekyll for sending email feature.
formspree service
we can use formspree service without joining up. click below link to go formspree service site.
- formspree service site: https://formspree.io/
use formspree service
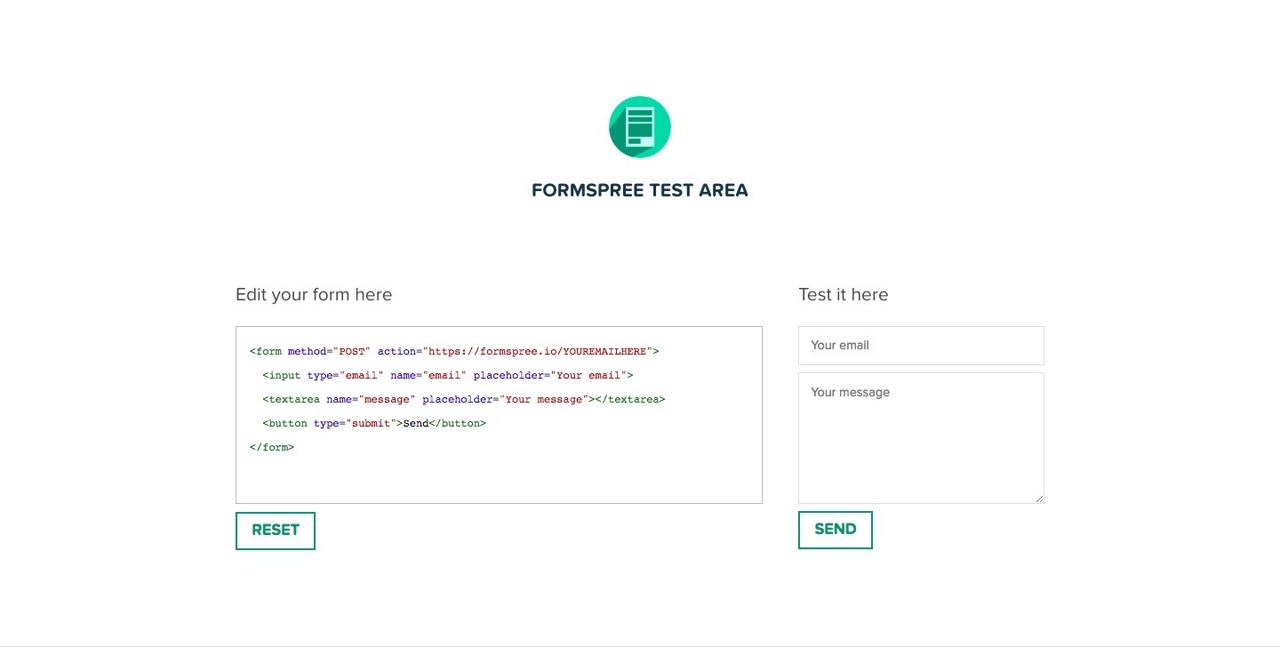
you can see below screen when you click above link to move formspree service.

click Try Formspree! link on the left top of the page.

edit the code under Edit your form here for your site’s form when you see above screen.
<form method="POST" action="https://formspree.io/YOUREMAILHERE">
write your email to action attribute of the form tag.
<form method="POST" action="https://formspree.io/[email protected]">
and then use Test it here on the right side to send email which you writed.
when you send email, formspree will send email for verifying your email. check your email for confirming that.
we ready to apply formspree service to jekyll project for email feature.
apply formspree to jekyll
copy-paste the source which you made on Formspree site to _layout/contact.html file. layout file may vary depending on your theme. below code is what we use really.
<form name="sentMessage" id="contactForm" novalidate action="https://formspree.io/[email protected]" method="post">
    <input type="hidden" name="_subject" value="블로그에서 새로운 연락이 왔습니다." />
    <input type="text" name="_gotcha" style="display:none" />
    <div class="control-group">
        <div class="form-group floating-label-form-group controls">
        <label></label>
        <input type="text" class="form-control" placeholder="" id="name" name="name" required data-validation-required-message="">
        <div class="help-block text-danger"></div>
        </div>
        <div class="form-group floating-label-form-group controls">
        <label></label>
        <input type="email" class="form-control" placeholder="" id="email" name="email" required data-validation-validemail-message="" data-validation-required-message="">
        <div class="help-block text-danger"></div>
        </div>
        <div class="form-group floating-label-form-group controls">
        <label></label>
        <textarea rows="5" class="form-control" placeholder="" id="message" name="message" required data-validation-required-message=""></textarea>
        <div class="help-block text-danger"></div>
        </div>
    </div>
    <br>
    <div id="success"></div>
    <div class="form-group">
        <button type="submit" class="btn btn-primary" id="sendMessageButton">Send</button>
    </div>
</form>
action="https://formspree.io/[email protected]"
edit action attribute of form tag like above to use email which you set _config.yml.
<input type="text" name="_gotcha" style="display:none" />
above code is to display CAPTCHA when send email.
<input type="hidden" name="_subject" value="블로그에서 새로운 연락이 왔습니다." />
set email title using above code.
complete
everything is completed. go to your site and send email for test.
reference
- official site: formspree service
Was my blog helpful? Please leave a comment at the bottom. it will be a great help to me!
App promotion
Deku.Deku created the applications with Flutter.If you have interested, please try to download them for free.


