目次
概要
React Nativeで地図を表示して、現在の位置情報を表示する方法について調べてみようかと思っています。React Nativeで地図をコントロールするためにはReact Nativeコミュニティーのreact-native-mapsライブラリを良く使っています。
今回のブログではreact-native-mapsを使ってReact Nativeで地図を表示して、現在の位置情報を地図の上に表示する方法について調べてみます。
このブログで紹介するソースコードはgithubで確認することができます。。
- github: react-native-map-example
例題ソースコードは下記の内容が適用されています。もっと詳しく知りたい方は下記のリンクを参考してください。
react-native-mapsインストール
下記のコマンドでreact-native-mapsをインストールします。
npm install --save react-native-maps
ライブラリの連結
インストールしたライブラリをReact Nativeプロジェクトに連結する必要があります。
0.60以上
下記のコマンドでreact-native-mapsをReact Nativeプロジェクトへ連結します。
cd ios
pod install
cd ..
0.59以下
下記のコマンドでreact-native-mapsをReact Nativeプロジェクトへ連結します。
react-native link react-native-maps
手動で連結する方法については公式サイトを参考してください。
iOSでグーグルマップを使う方法
0.60以上のバージョンでは、iOSでグーグルマップを使うため、ios/[project name]/AppDelegate.mファイルを開いて下記のように修正します。
#import <GoogleMaps/GoogleMaps.h>

@implementation AppDelegate
...

- (BOOL)application:(UIApplication *)application didFinishLaunchingWithOptions:(NSDictionary *)launchOptions
{
+  [GMSServices provideAPIKey:@"_YOUR_API_KEY_"]; // add this line using the api key obtained from Google Console
...
そしてios/Podfileを開いて下記のように修正します。
...
pod 'Folly', :podspec => '../node_modules/react-native/third-party-podspecs/Folly.podspec'

# react-native-maps dependencies
pod 'react-native-maps', path: '../node_modules/react-native-maps'
  pod 'react-native-google-maps', path: '../node_modules/react-native-maps'  # Remove this line if you don't want to support GoogleMaps on iOS
pod 'GoogleMaps'  # Remove this line if you don't want to support GoogleMaps on iOS
pod 'Google-Maps-iOS-Utils' # Remove this line if you don't want to support GoogleMaps on iOS

target 'ReactNativeMapExampleTests' do
...
最後に下記のコマンドを実行してiOSに必要なライブラリをインストールします。
cd ios
pod install
cd ..
0.59以下バージョンを使っている方は公式サイトを参考してください。
使い方
react-native-mapsを使って地図を表示したいところに下記のように修正します。
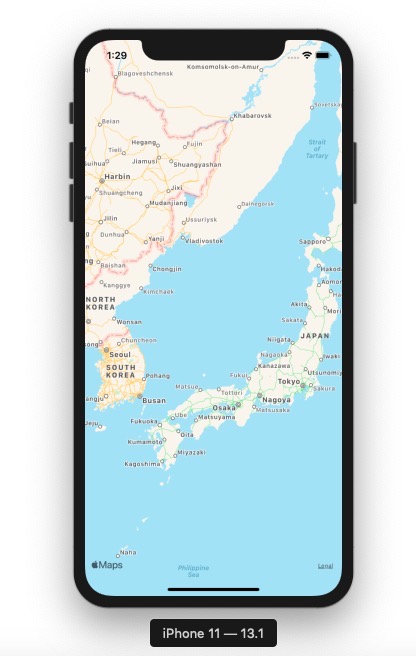
Appleマップ
Appleマップを使って地図を表示するためには、下記のように修正します。
import React from 'react';
import Styled from 'styled-components/native';
import MapView from 'react-native-maps';

const Container = Styled.View`
    flex: 1;
`;

const AppleMap = () => {
  return (
    <Container>
      <MapView style={{flex: 1}} />
    </Container>
  );
};

export default AppleMap;
下記のコマンドでReact Nativeを実行すると
npm run ios
# android
# npm run android
下記のような結果画面を見ることができます。
Googleマップ
グーグルマップを使うためには下記のように修正します。
import React from 'react';
import Styled from 'styled-components/native';
import MapView, {PROVIDER_GOOGLE} from 'react-native-maps';

const Container = Styled.View`
    flex: 1;
`;

const GoogleMap = () => {
  return (
    <Container>
      <MapView style={{flex: 1}} provider={PROVIDER_GOOGLE} />
    </Container>
  );
};

export default GoogleMap;
下記のコマンドでReact Nativeプロジェクトを実行すると
npm run ios
# android
# npm run android
下記のような結果画面を見ることができます。
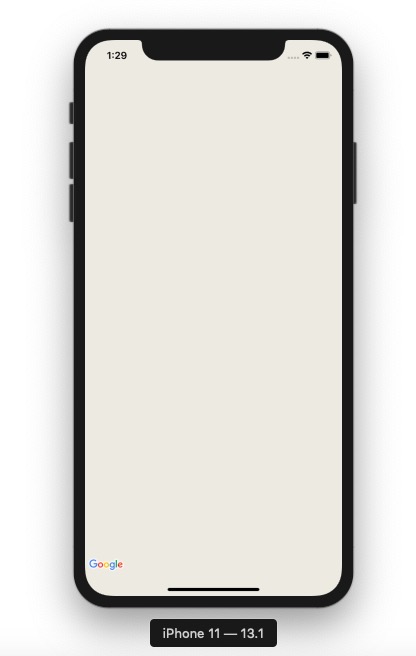
(ここでグーグルマップが表示されない理由は、例題にあるprovideAPIKeyを使ったためです。皆さんが正しいprovideAPIKeyを使うとグーグルマップが表示されることが確認できます。)
地図の初期位置設定
下記のように修正すると、地図の初期位置を設定することができます。
import React from 'react';
import Styled from 'styled-components/native';
import MapView from 'react-native-maps';

const Container = Styled.View`
    flex: 1;
`;

const InitialLocation = () => {
  return (
    <Container>
      <MapView
        style={{flex: 1}}
        initialRegion={{
          latitude: 37.78825,
          longitude: -122.4324,
          latitudeDelta: 0.0922,
          longitudeDelta: 0.0421,
        }}
      />
    </Container>
  );
};

export default InitialLocation;
地図へマーカー(Marker)を表示
下記のように修正すると、地図の上にマーカー(Marker)を表示することができます。
import React from 'react';
import Styled from 'styled-components/native';
import MapView, {Marker} from 'react-native-maps';

const Container = Styled.View`
    flex: 1;
`;

const MarkerOnMap = () => {
  return (
    <Container>
      <MapView
        style={{flex: 1}}
        initialRegion={{
          latitude: 37.78825,
          longitude: -122.4324,
          latitudeDelta: 0.0922,
          longitudeDelta: 0.0421,
        }}>
        <Marker
          coordinate={{latitude: 37.78825, longitude: -122.4324}}
          title="this is a marker"
          description="this is a marker example"
        />
      </MapView>
    </Container>
  );
};

export default MarkerOnMap;
地図の位置を追跡する
MapViewのonRegionChangeとonRegionChangeCompleteを使えば、地図の位置が変更されたことを追跡できます。
<MapView
  onRegionChange={region => {
    setLocation({
      latitude: region.latitude,
      longitude: region.longitude,
    });
  }}
  onRegionChangeComplete={region => {
    setLocation({
      latitude: region.latitude,
      longitude: region.longitude,
    });
  }}
>
下記のソースコードは、ユーザが地図の初期位置から他のところに移動させる時、当該位置を追跡(トラッキング)して地図のセンターへマーカーを表示する方法です。
import React, {useState} from 'react';
import Styled from 'styled-components/native';
import MapView, {Marker} from 'react-native-maps';

const Container = Styled.View`
    flex: 1;
`;

interface IGeolocation {
  latitude: number;
  longitude: number;
}

const TrackingMapWithMarker = () => {
  const [location, setLocation] = useState<IGeolocation>({
    latitude: 37.78825,
    longitude: -122.4324,
  });
  return (
    <Container>
      <MapView
        style={{flex: 1}}
        initialRegion={{
          latitude: location.latitude,
          longitude: location.longitude,
          latitudeDelta: 0.0922,
          longitudeDelta: 0.0421,
        }}
        onRegionChange={region => {
          setLocation({
            latitude: region.latitude,
            longitude: region.longitude,
          });
        }}
        onRegionChangeComplete={region => {
          setLocation({
            latitude: region.latitude,
            longitude: region.longitude,
          });
        }}>
        <Marker
          coordinate={{
            latitude: location.latitude,
            longitude: location.longitude,
          }}
          title="this is a marker"
          description="this is a marker example"
        />
      </MapView>
    </Container>
  );
};

export default TrackingMapWithMarker;
ユーザーの現在位置を表示
ユーザの現在位置を表示するためには、ユーザの現在位置を取得する必要があります。ユーザの現在位置を取得する方法については下記のブログを参考してください。
このように取ってきたユーザデータを表示するため下記のソースコードを使います。
import React, {useState, useEffect} from 'react';
import Styled from 'styled-components/native';
import MapView, {Marker} from 'react-native-maps';
import Geolocation from 'react-native-geolocation-service';

const Container = Styled.View`
    flex: 1;
`;

interface ILocation {
  latitude: number;
  longitude: number;
}

const UserLocation = () => {
  const [location, setLocation] = useState<ILocation | undefined>(undefined);

  useEffect(() => {
    Geolocation.getCurrentPosition(
      position => {
        const {latitude, longitude} = position.coords;
        setLocation({
          latitude,
          longitude,
        });
      },
      error => {
        console.log(error.code, error.message);
      },
      {enableHighAccuracy: true, timeout: 15000, maximumAge: 10000},
    );
  }, []);
  return (
    <Container>
      {location && (
        <MapView
          style={{flex: 1}}
          initialRegion={{
            latitude: location.latitude,
            longitude: location.longitude,
            latitudeDelta: 0.0922,
            longitudeDelta: 0.0421,
          }}>
          <Marker
            coordinate={{
              latitude: location.latitude,
              longitude: location.longitude,
            }}
          />
        </MapView>
      )}
    </Container>
  );
};

export default UserLocation;
結果画面は下記のようです。

ユーザの位置情報の追跡表示
位置情報ライブラリであるreact-native-geolocation-serviceを使うと、ユーザの位置情報を追跡することができます。react-native-geolocation-serviceライブラリに関しては下記のリンクを参考してください。
ユーザの位置情報を追跡してマーカー(Marker)を表示する例題は下記のようです。
import React, {useState, useEffect} from 'react';
import Styled from 'styled-components/native';
import MapView, {Marker} from 'react-native-maps';
import Geolocation from 'react-native-geolocation-service';

const Container = Styled.View`
    flex: 1;
`;

interface ILocation {
  latitude: number;
  longitude: number;
}

const TrackUserLocation = () => {
  const [locations, setLocations] = useState<Array<ILocation>>([]);
  let _watchId: number;

  useEffect(() => {
    _watchId = Geolocation.watchPosition(
      position => {
        const {latitude, longitude} = position.coords;
        setLocations([...locations, {latitude, longitude}]);
      },
      error => {
        console.log(error);
      },
      {
        enableHighAccuracy: true,
        distanceFilter: 100,
        interval: 5000,
        fastestInterval: 2000,
      },
    );
  }, [locations]);

  useEffect(() => {
    return () => {
      if (_watchId !== null) {
        Geolocation.clearWatch(_watchId);
      }
    };
  }, []);

  return (
    <Container>
      {locations.length > 0 && (
        <MapView
          style={{flex: 1}}
          initialRegion={{
            latitude: locations[0].latitude,
            longitude: locations[0].longitude,
            latitudeDelta: 0.0922,
            longitudeDelta: 0.0421,
          }}>
          {locations.map((location: ILocation, index: number) => (
            <Marker
              key={`location-${index}`}
              coordinate={{
                latitude: location.latitude,
                longitude: location.longitude,
              }}
            />
          ))}
        </MapView>
      )}
    </Container>
  );
};

export default TrackUserLocation;
ユーザの位置追跡の結果画面は下記のようです。

その他の機能
地図の初期位置設定やマーカー(Marker)表示以外にも沢山の機能を提供しています。下記のリンクで公式サイトを参考してください。
- Rendering a Marker with a custom view
- Rendering a Marker with a custom image
- Rendering a custom Marker with a custom Callout
- Draggable Markers
- Using a custom Tile Overlay
- Overlaying other components on the map
- Customizing the map style
- Animated Region
- Animated Marker Position
- Take Snapshot of map
- Zoom to Specified Markers
完了
これでReact Nativeで地図を表示する方法についてみてみました。このライブラリを使うと地図の上にマーカーを表示するだけではなく、ポリゴン(Polygon)やポリライン(Polyline)も表示することができます。
地図を持ってるサービスを準備中である方はこのライブラリを使ってみることをおすすめします。
私のブログが役に立ちましたか?下にコメントを残してください。それは私にとって大きな大きな力になります!
アプリ広報
Dekuが開発したアプリを使ってみてください。Dekuが開発したアプリはFlutterで開発されています。興味がある方はアプリをダウンロードしてアプリを使ってくれると本当に助かります。